With the high pace of development, data architects/engineers must be able to keep up with our DevOps counterparts. We also want the many benefits of CI/CD for databases such as fewer errors, stable builds, better release management, and less manual work.
Here we will walk through using your database project in a GitHub repo to implement CI/CD. The four main areas we will cover are:
- Setup
- Creating a Build Pipeline
- Creating a Release Pipeline
- Enabling Continuous Integration
You may find it beneficial to read through and review the screenshots before following along and implementing the steps.
Prerequisites
- Visual Studio Database Project
- GitHub Extension
- GitHub Account
- Azure DevOps Account and project
- The project can be empty if you are using GitHub for version control
- Your Azure Account must have ‘Owner’ or ‘User Access Administrator’ permissions on the Subscription. This is needed to set up a Service Principal
Setup
- Azure SQL Database for production and development with Adventure Works LT sample database.
- A Visual Studio Database project of the Production database.
- Project added to GitHub
- A DevOps Project. Can be empty.
GitHub Add On
We will use Azure Pipelines within the DevOps Project to facilitate CI/CD. Since our project is in GitHub, we have to install Azure Pipelines from the GitHub Marketplace.
In GitHub, select Marketplace. Then search for Azure Pipelines.
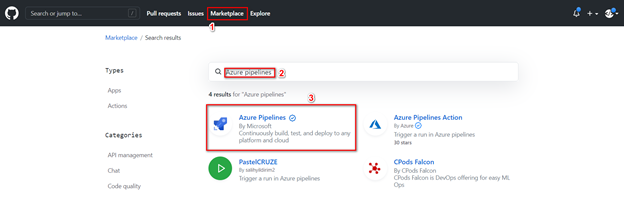
Select Azure Pipelines. Since I have it installed already, there is a green checkmark.
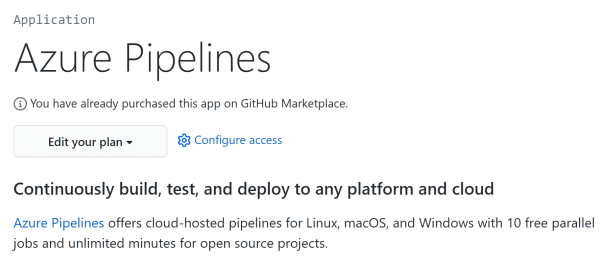
You will see some information about Azure Pipelines. It is free.
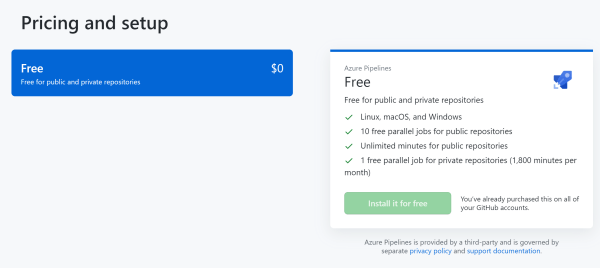
Install the add on, link, and authorize it to your accounts.
Create a Build Pipeline
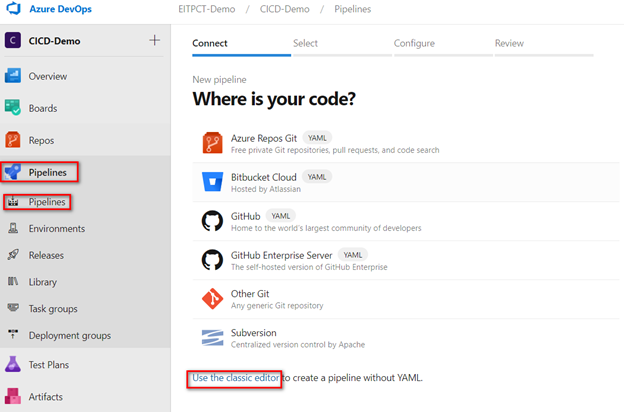
In your DevOps Project, go to Pipelines, and select Create Pipeline.


Click on New Pipeline, and we will create a new build pipeline. We will use the Classic Editor instead of writing YAML. Click on Use the classic editor.
There are several sources for your code. We will select GitHub, update the Connection name, and Authorize using OAuth.
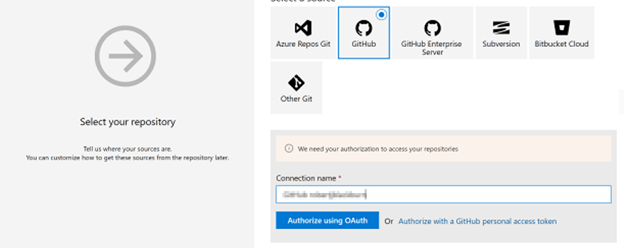
After you authorize the Pipeline to GitHub, enter the Repo and Branch. We will use Master Branch for the demo. In production, you will use a release or integration branch. Press Continue.

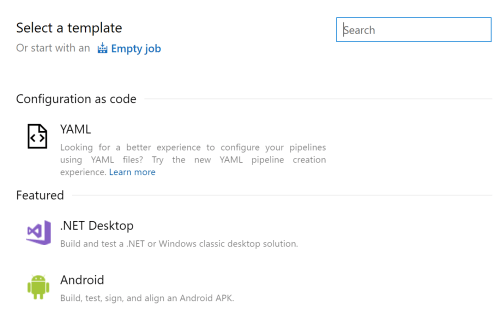
We can start with a template or an Empty Job. Currently, no database templates exist. But, the .NET Desktop template’s description is to build a desktop solution. This will get us the tasks we need. Select .NET Desktop template.
There are more tasks than we need.

Let’s clean up the tasks and update a few other parameters.
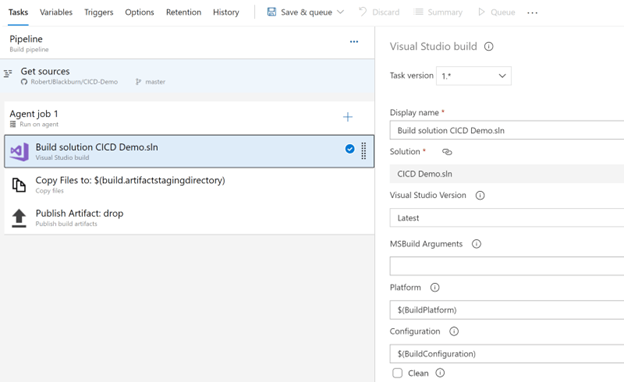
We only need three tasks: Build solution, Copy File to, and Publish Artifact. Right-click on the other tasks and remove them. This leaves us with three tasks
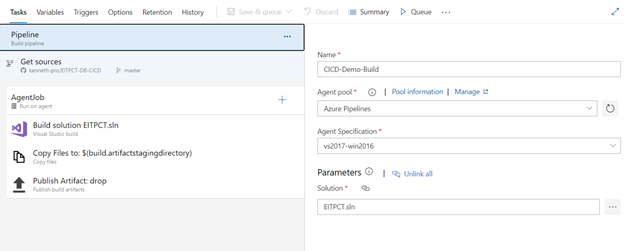
Next, we can rename the Pipeline to CICD Demo-Build.
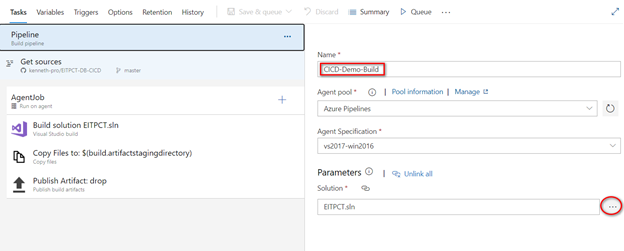
With the Pipeline highlighted, we will set the solution path. Click on the ellipses. In the selection box, select the solution file. In my case it’s EITPCT.sln. The Pipeline parameters looks the following.
For the Build solution task, we will leave the default parameters.
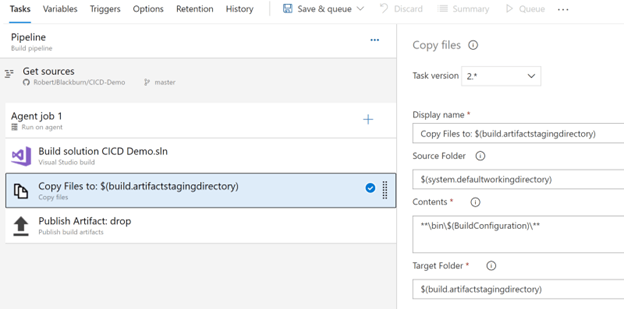
We will also leave the defaults for the Copy File to task.
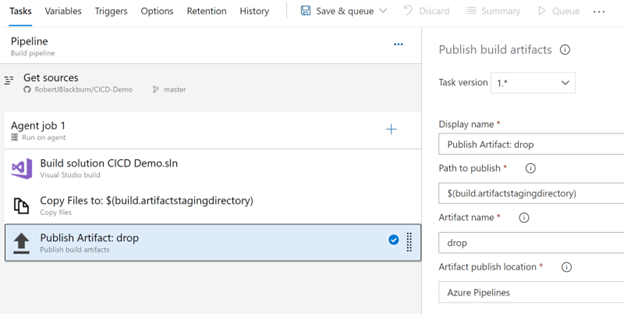
Again, we will leave the defaults for the Publish Artifact task. This artifact will be used in the Release pipeline to publish to SQL Server.
To run, we click Save & queue then Save and run.
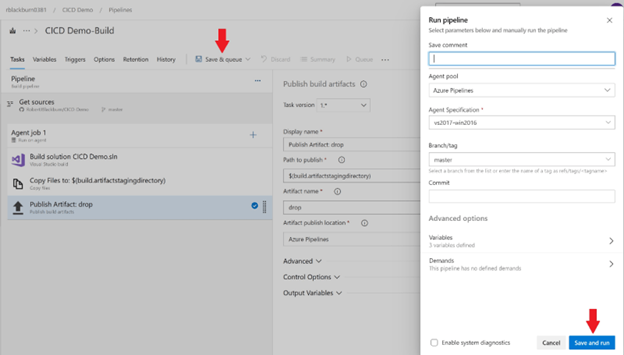
This will kick off the build process. Occasionally, this freezes on me and you will have to refresh the browser.
To see the results, click on Summary.

Click on the Run.

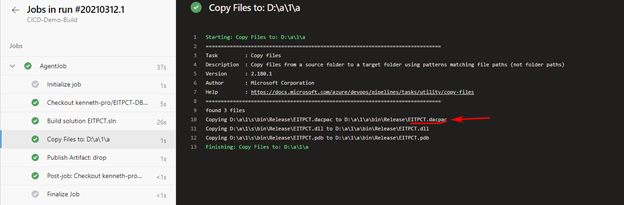
Click on the Job.
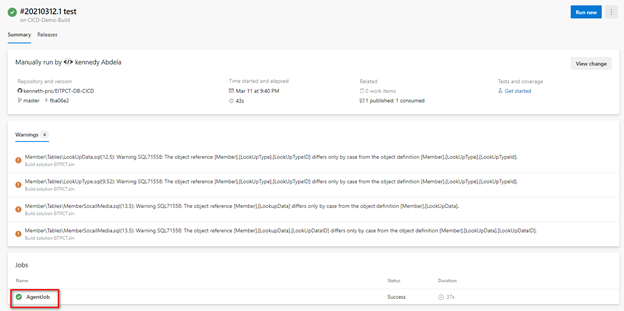
We can see each step completed. Highlight the Copy Files to task. Here we can see the location of the artifact (dacpac).
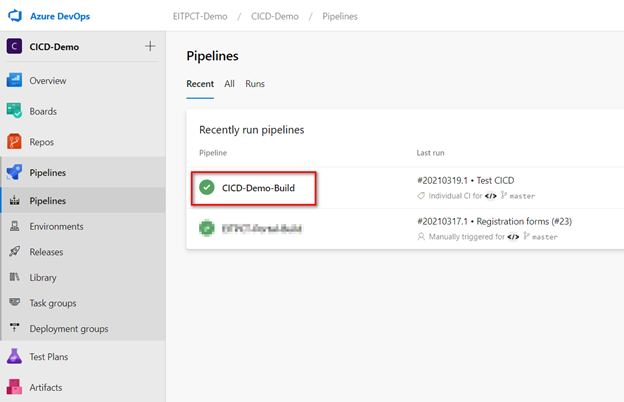
Go back to DevOps Pipelines and see your new pipeline.
Release Pipeline
Our Build is only half the solution. The second half is creating a Release to push our changes to a database.
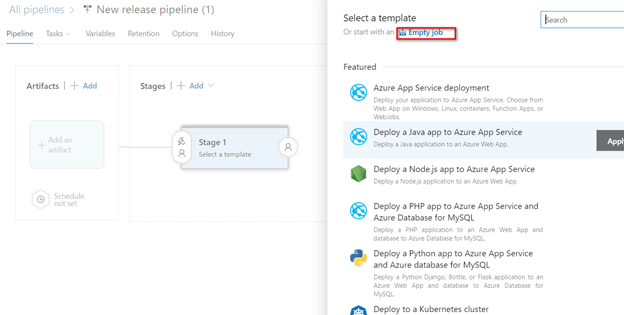
From the Releases tab, click on New Pipeline.

For the release pipeline, we will start with an Empty Job.
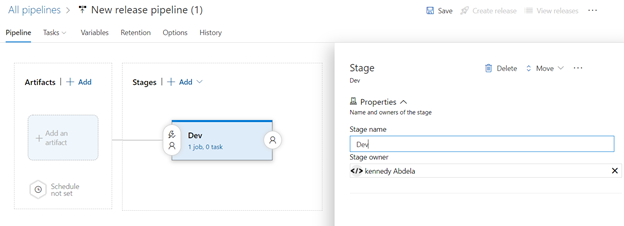
For the Stage Name, we will use Dev.
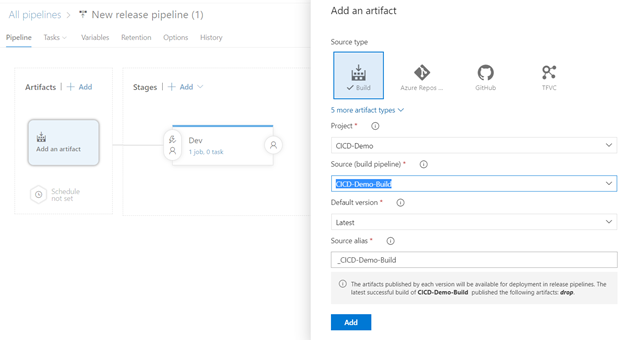
Close the Stage window. Click on the Add an Artifact and select the source. You can change the alias if you like. Click Add.
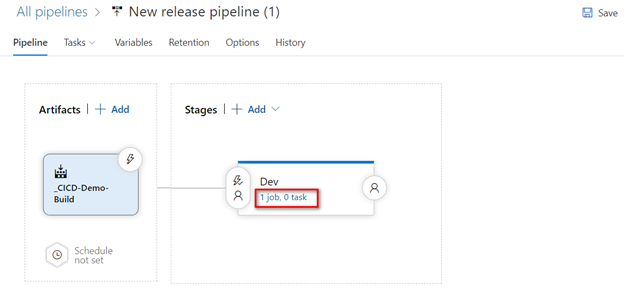
In the Stages box, click task link.
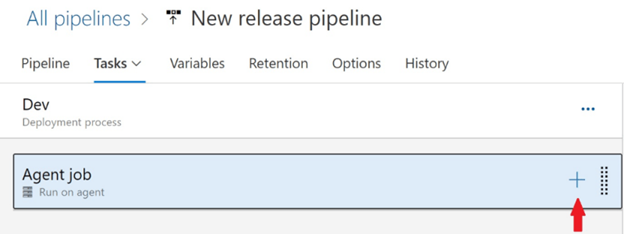
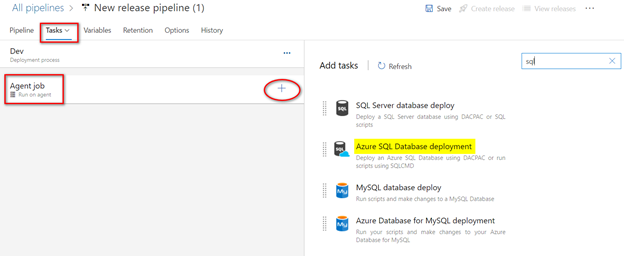
Highlight the Agent Job and click the ‘+’ to add a task
In the search box, search for ‘azure sql’ and add Azure SQL Database deployment.
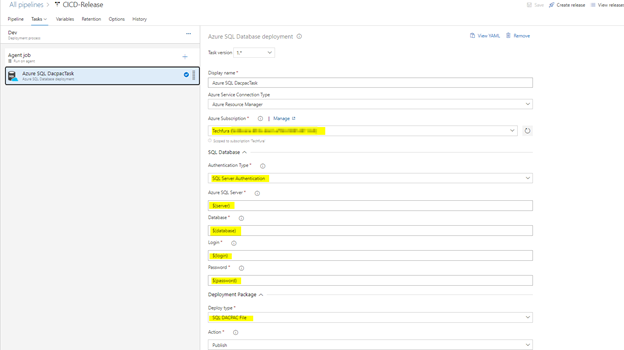
Set up this task with the following information.
- Give it a Display name
- Enter Azure Subscription. You will have to authorize it if it is the first time.
- Authentication Type is SQL Server Authentication.
- Enter the Server
- Enter the Database
- Create a variable for login: $(Server_login)
- Create a variable for the password: $(Server_password)
- Click the ellipses for the dacpac file. Follow the folders down until you get to your dacpac. Select it and press OK.
Select the Variables tab and add the variables.
Important: Click the lock on the Value box for the password variable to store it as a secret.
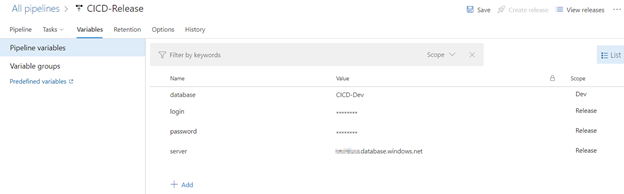
Change the scope to DEV.
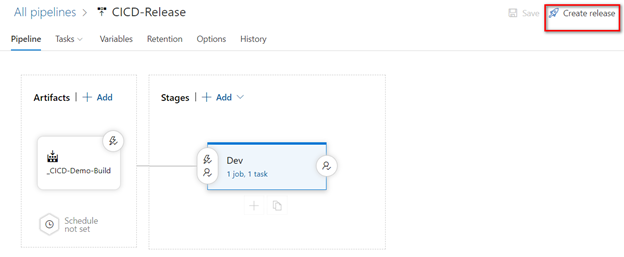
Go Back to the Tasks tab, give it a new name, and click Save. Accept the default folder.

Create a release by clicking Create release.
The release has been created

We can see the release succeeded.
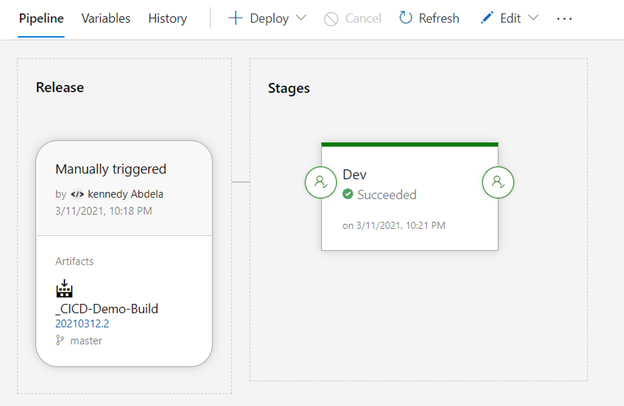
And now you can verify your changes in the database.
Enable Continuous Integration
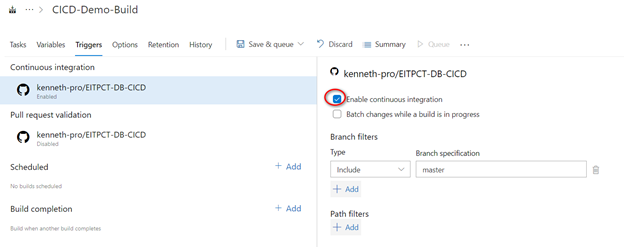
Go back to the Build pipeline and select Edit. On the Triggers tab check Enable continuous integration. Here we still have the Master branch for the Demo. However, you may set a release or integration branch you want to enable. Click Save & queue then click save.
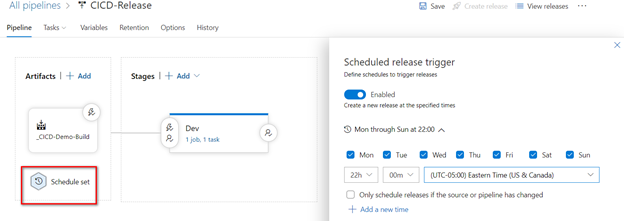
Next, edit the Release pipeline and set the schedule. I set mine to do a release every work night at 10 PM if any changes were made.
The schedule is set.

Customize
Now that you have manually built the solution, deployed, and set up CI/CD, you can continue to customize the process to meet your needs. You can add another step to deploy to a QA database or create a separate release to manually run when requested for QA. For complex environments, you can change the server’s name and other parameters to variables for better management.
Conclusion
With CI/CD for your database, you will decrease manual errors, speed up releases, and support Agile Sprints. Start with an integration or QA database and extend your pipelines to cover your system’s lifecycle.